Warehouse routing
Warehouse routing controls the order pickers walk your warehouse. You describe how your storage location codes are put together, and Scanpacker sequences every pick list from that instead of sorting locations alphabetically. You’ll find it under Settings → Warehouse routing in the Scanpacker app.
Before you set this up, make sure your products have storage locations assigned. Routing works from those codes, so there’s nothing to sequence without them.
Parts of a location code
A storage location code is made up of parts, and each part describes a physical aspect of your warehouse. For example, a code like A-12-03-B has four parts, which often represent Zone, Aisle, Bay and Shelf.
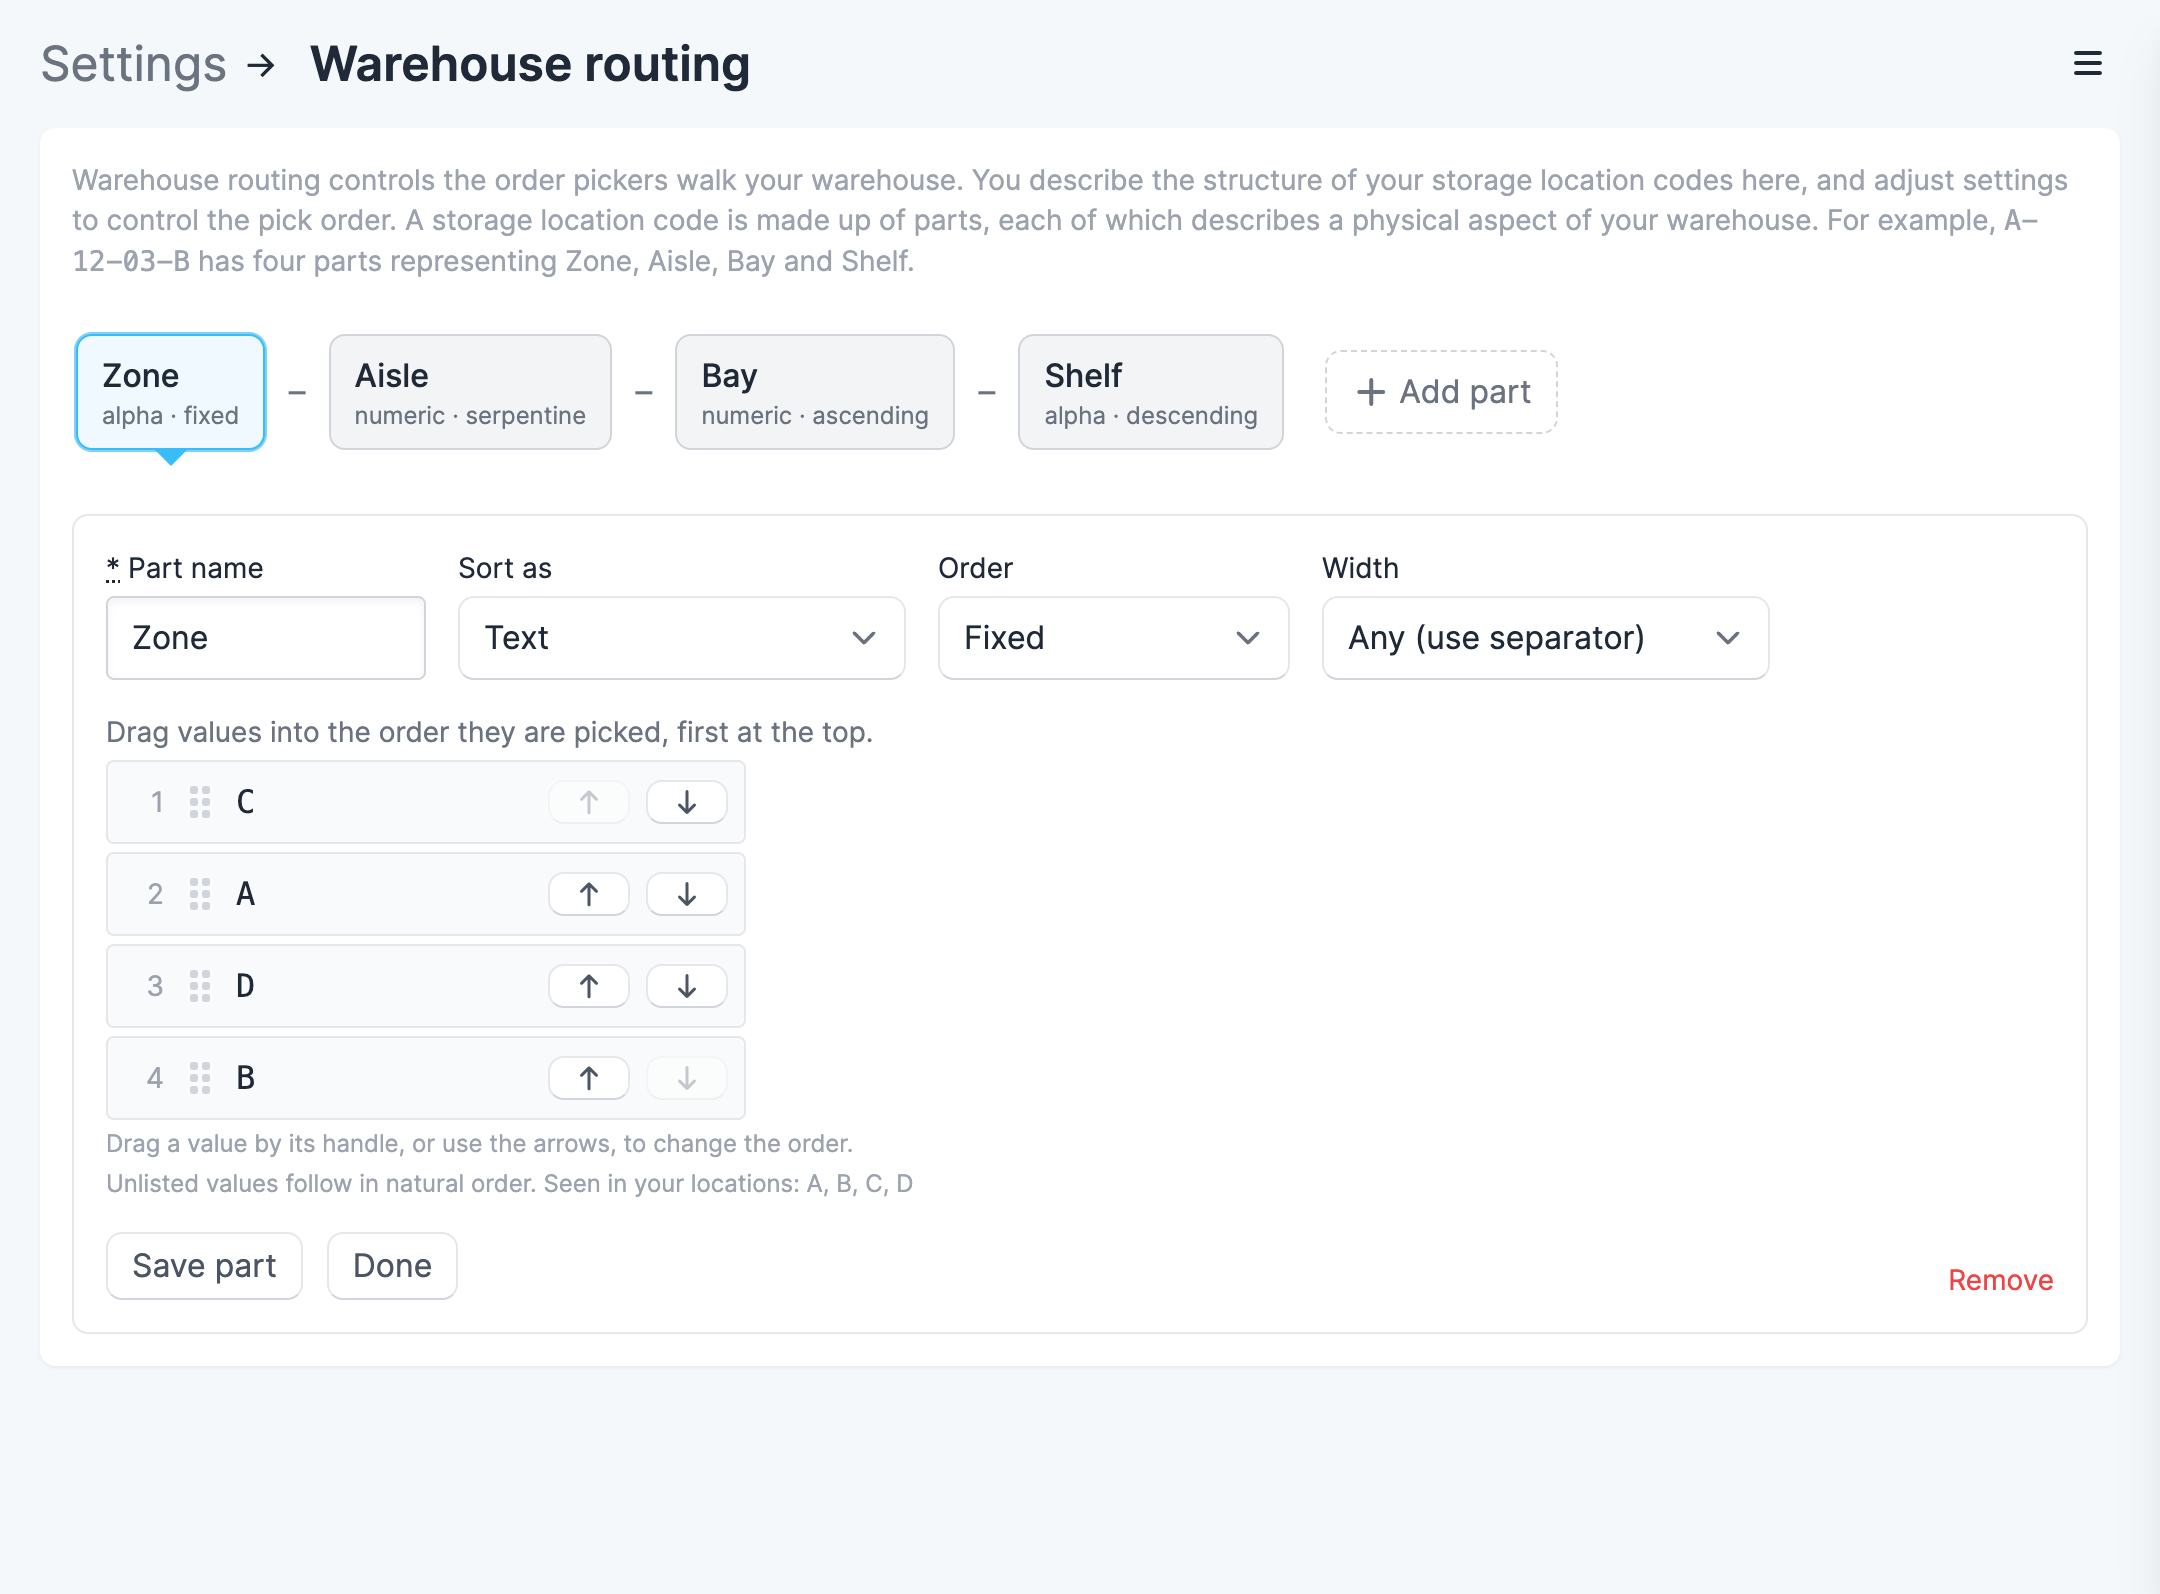
The bar at the top of the page shows your parts left to right, in the same order they’re written in your codes. Click Add part to add one, or click a part to edit it. Between the parts is the separator — the character that divides them, such as the - in A-12-03-B. Click it to change it.
To add a part:
- Go to Settings → Warehouse routing.
- Click Add part.
- Give it a name that matches what it means in your warehouse — Zone, Aisle, Bay, Shelf.
- Click Add. The part opens in the editor, where you set how it’s read and how it’s ordered.
Add your parts left to right. If your codes are A-12-03-B, that’s Zone, then Aisle, then Bay, then Shelf.
How a part is read
Each part has a Sort as setting that decides how its value is read:
- Natural (numbers in order) — a mix of letters and numbers, with numbers read as numbers.
9comes before14, andA2beforeA10. This is the default and suits most parts. - Number — the whole value is one number. Use it for parts that are always numeric, like an aisle number.
- Text — the value is sorted as plain text. Use it for parts that are always letters, like a zone letter.
The choice also affects where a part ends. A Text part stops at the first character that isn’t a letter, and a Number part stops at the first character that isn’t a digit — so parts can run together with no separator between them. In A12-03, a Text Zone takes the A and a Number Aisle takes the 12, even though nothing divides them.
Controlling the order of travel
Each part has an Order setting that decides which way pickers travel through it:
- Ascending — lowest first. Aisle 1, then 2, then 3.
- Descending — highest first. Useful for picking a bay from the top shelf down.
- Serpentine — alternating. Travel up one aisle and down the next, so pickers don’t walk back to the start of every row. See serpentine order below.
- Fixed — an order you set by hand. See fixed order below.
Serpentine order
Serpentine flips direction based on the part before it. If Aisle is ascending and Bay is serpentine, pickers walk the bays of aisle 1 low to high, the bays of aisle 2 high to low, aisle 3 low to high, and so on.
Which aisles run forwards and which run backwards depends on where your packing station sits. If the walk comes out the wrong way round, tick Flip serpentine direction on the part to swap it.
Fixed order
Some parts have no natural order at all — zones named after what they hold, or a set of rooms you always visit in the same sequence. Choose Fixed and drag the values into the order they’re picked, first at the top. You can also use the up and down arrows.
Scanpacker fills this list from the storage locations already assigned to your products, so you normally only have to reorder it. A fixed part supports up to 50 distinct values, and any value not in your list is picked after the listed ones, in its natural order.
Fixed-width parts
A part can be a fixed width — a set number of characters rather than a piece split off at the separator. A fixed-width part has no separator after it; its width alone marks where it ends.
For example, in B3/11 the Zone is a fixed width of one letter (B) and runs straight into the Aisle (3); the Aisle and Shelf are then split by the /.
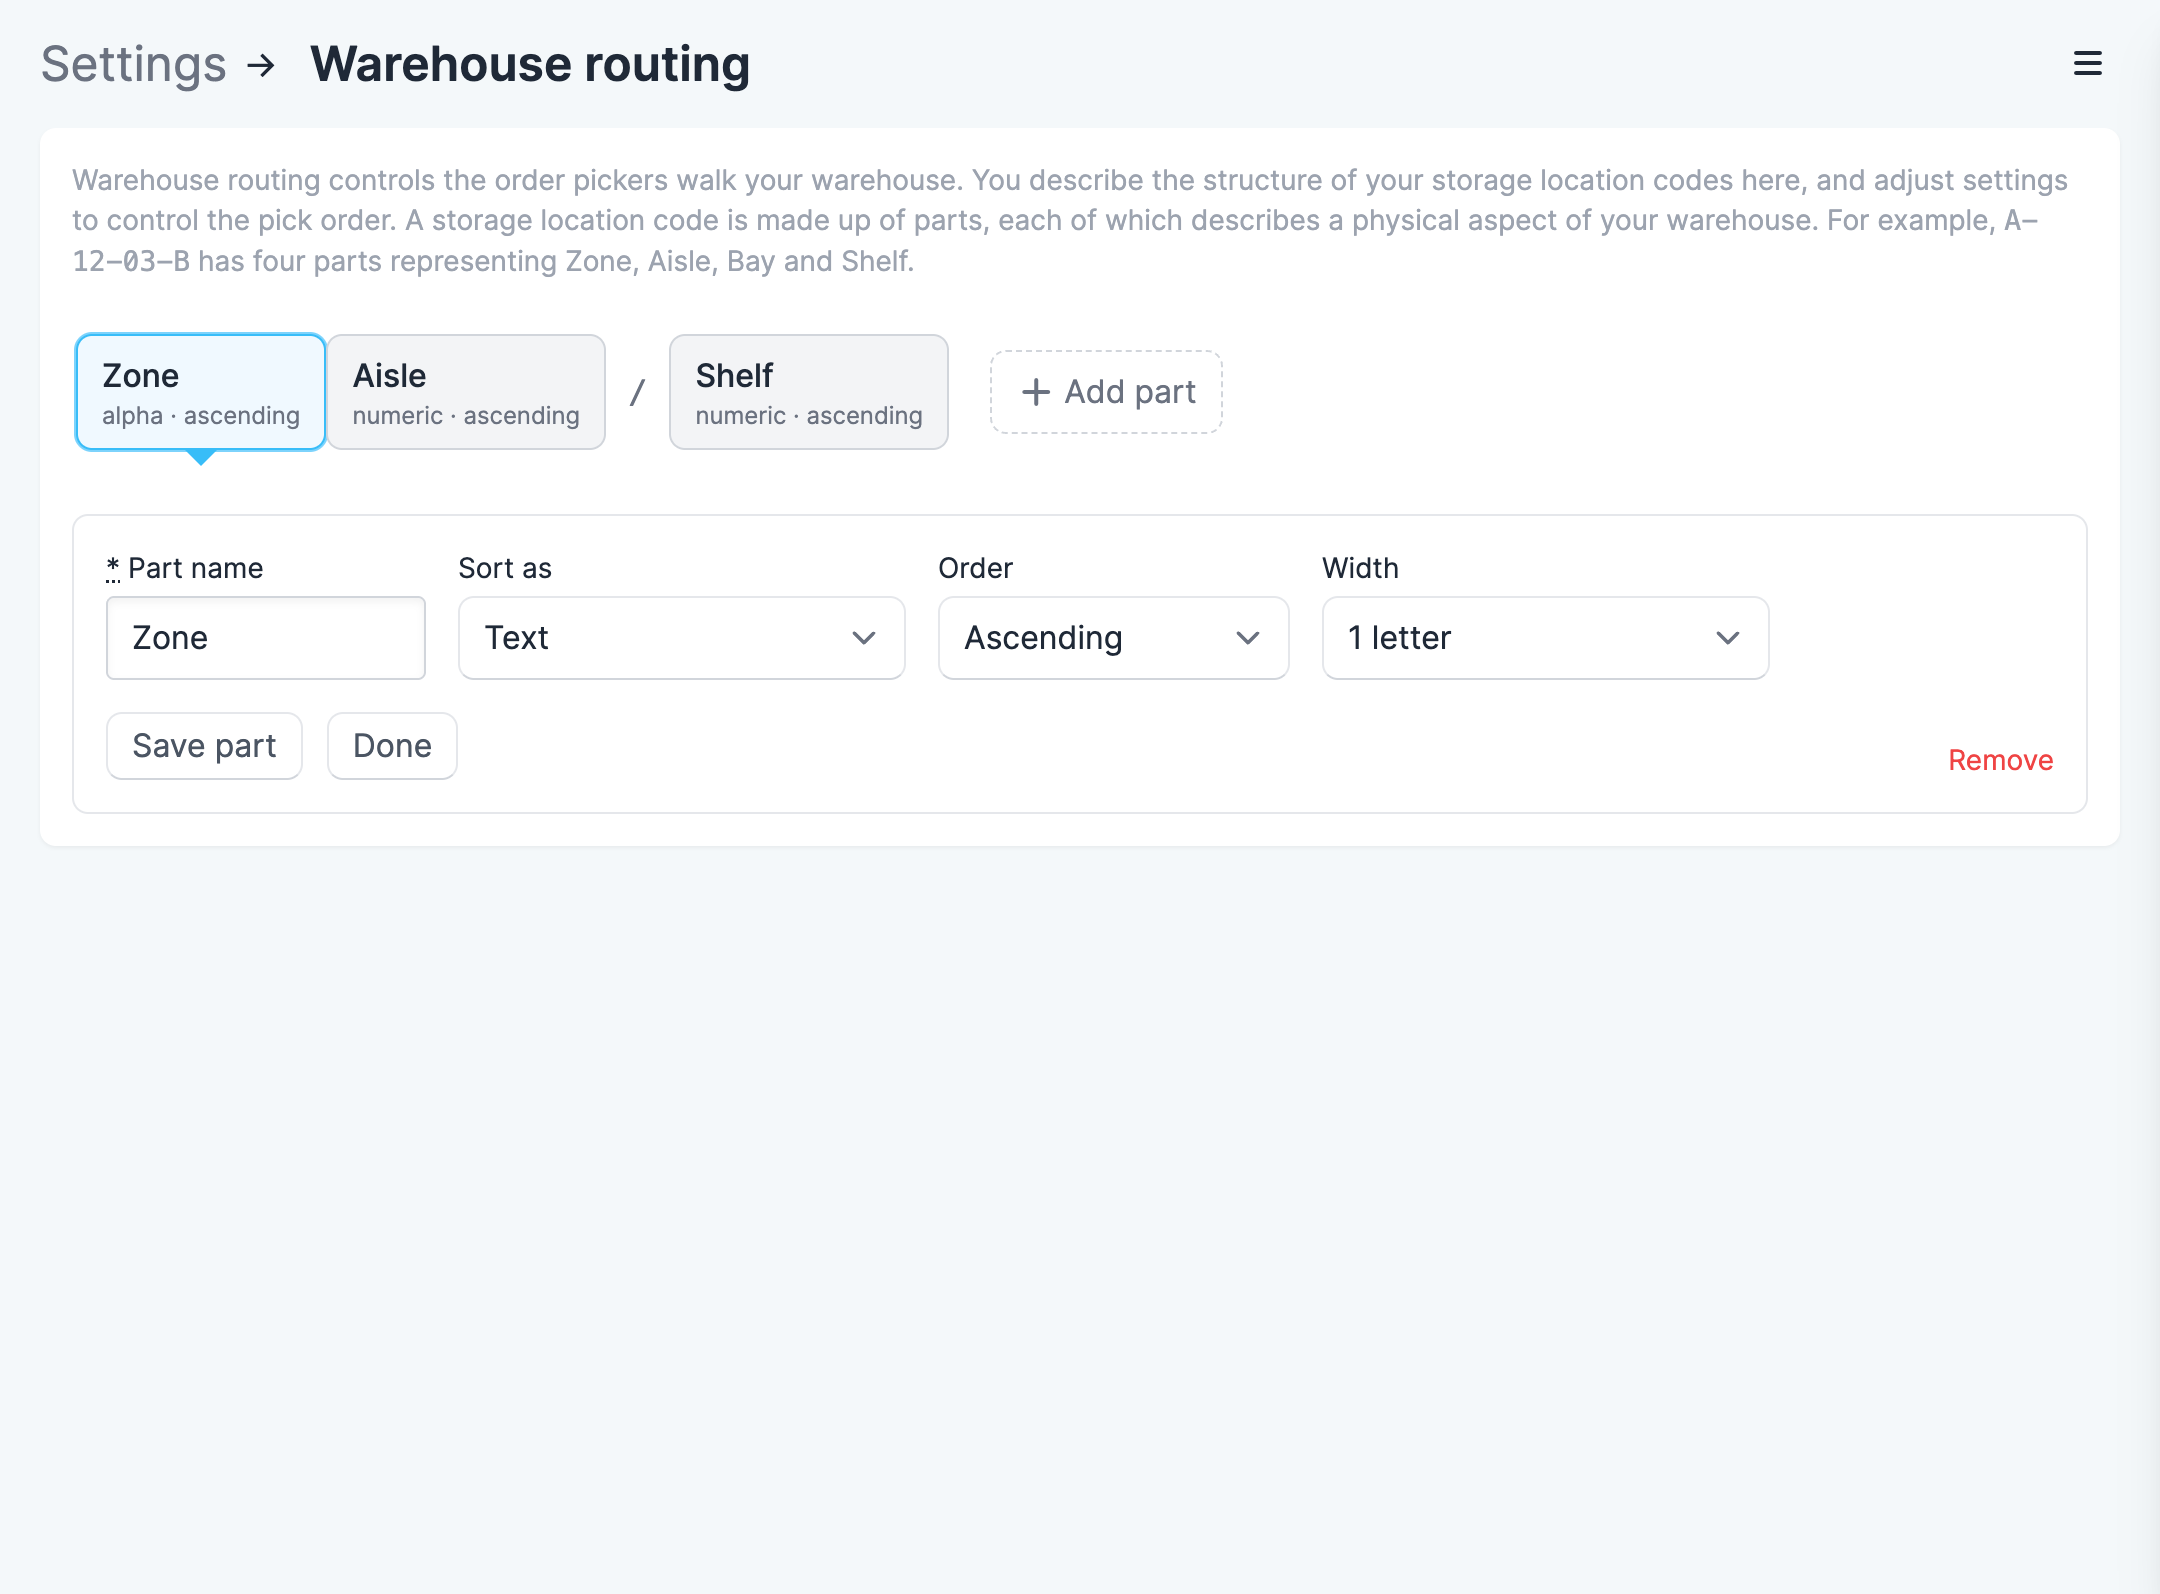
Set Width to Any (use separator) for a normal part, or to a number of letters for a fixed-width one.
Previewing the pick order
Before you commit to a format, check it against your real locations. Open the cog menu at the top of the page and choose Preview pick order. A panel slides out listing your storage locations in the exact order pick lists will follow.
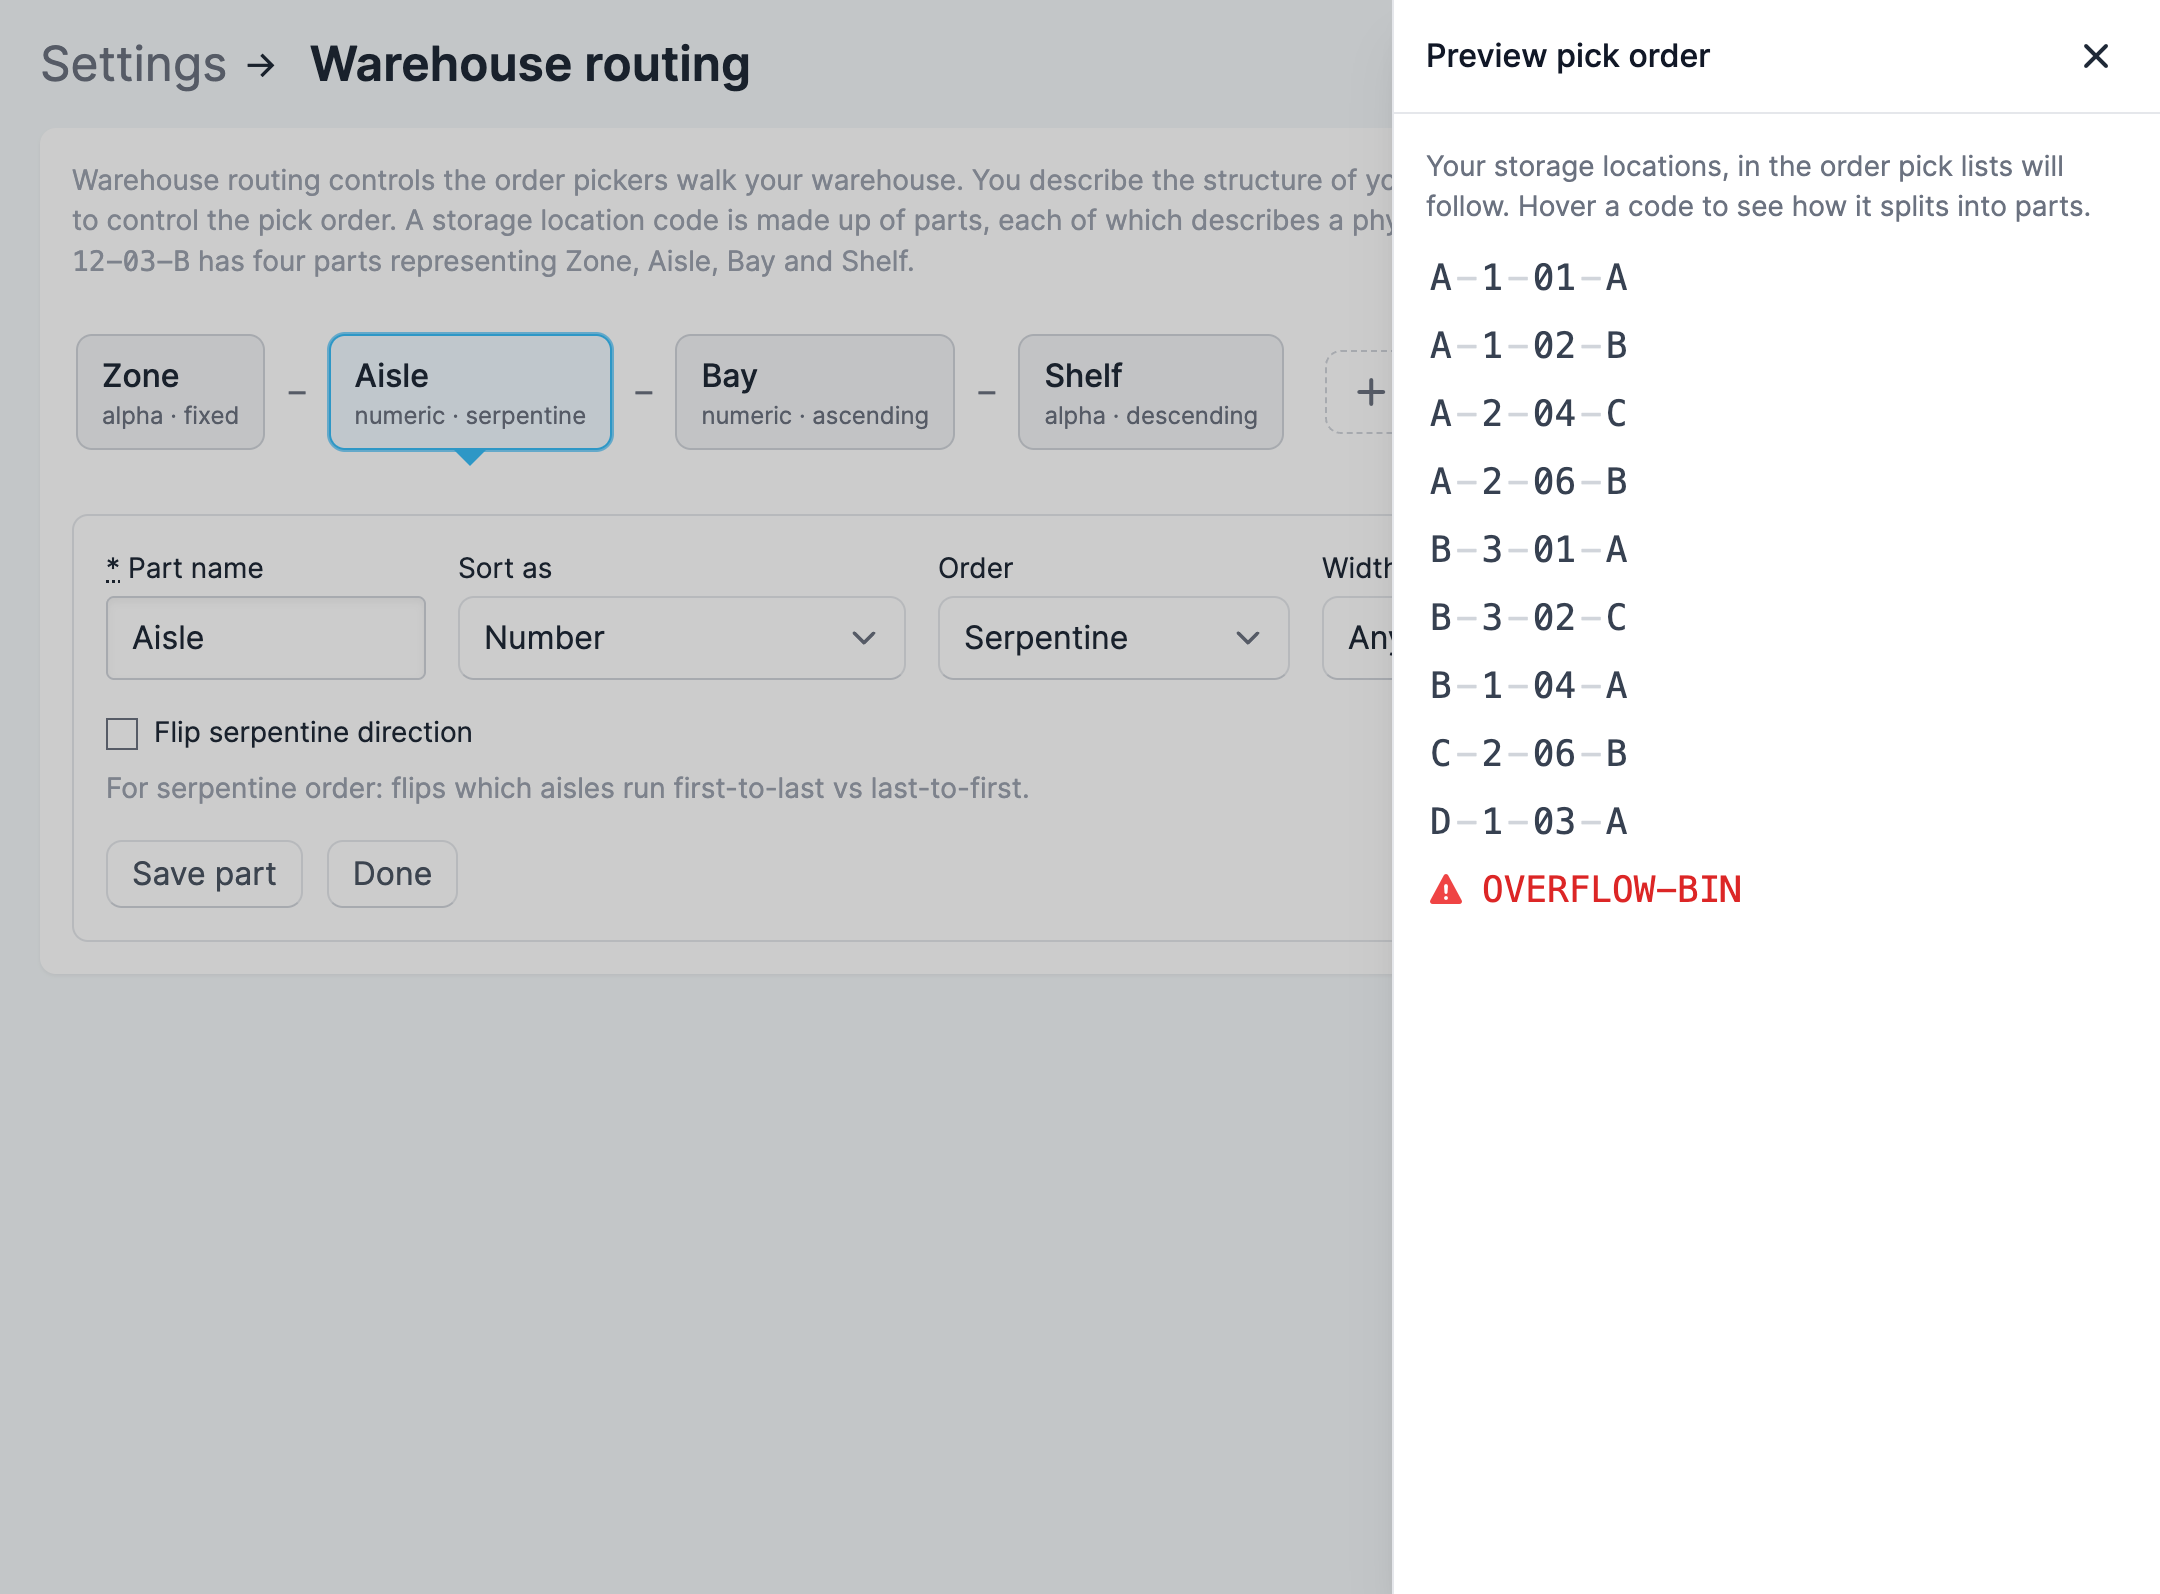
Hover a code to see how it splits into parts. Any code that doesn’t fit your format is marked with a warning triangle — it isn’t dropped, it’s read as far as it goes and placed after the codes that match. A handful of warnings usually means a few odd locations; a lot of them means your format doesn’t describe your codes yet.
The preview uses up to 200 of the distinct storage locations in use on your products.
If you set nothing up
Warehouse routing starts out unconfigured, and it’s fine to leave it that way. With no parts added, locations pick in their natural order — the same behaviour as before the feature existed. Products with no storage location are always picked last.
When changes take effect
Pick order is worked out when an order is started, so changes apply to batches and orders started from then on. Picking that’s already under way keeps the order it began with, and won’t reshuffle under a picker mid-batch.
Related documentation
- Storage locations — assigning location codes to your products
- Warehouse location systems — designing the codes themselves
- Batch picking — the picking workflows routing sequences